Hello friends, today we’re diving into a classic dish that’s as fun to make as it is to eat—the delicious Chicken Kiev recipe! This isn’t just any chicken dish; it’s a juicy chicken breast stuffed with a stream of hot garlic butter that will melt your taste buds with every bite. Whether you’re a seasoned home cook or just starting your culinary journey, this recipe is sure to impress and entertain your taste buds.
A Brief History of Chicken Kiev
Chicken Kiev, also known as Chicken Kyiv, is a dish with a storied history, though its exact origins are a bit of a culinary mystery. The dish is traditionally associated with Ukraine’s capital, Kyiv, hence the name. However, some food historians suggest that it might have been a French creation, later popularized by Russian chefs. What we do know is that it became a symbol of luxury dining in the Soviet Union, and today, it’s a beloved dish around the world.
This isn’t just a piece of chicken stuffed with butter—it’s a masterpiece of technique and flavor. The beauty of Chicken Kiev lies in its simplicity: a chicken breast is stuffed with herbed garlic butter, then breaded and fried until it’s golden brown and crisp on the outside, while still juicy and moist on the inside.
How to Serve Chicken Kiev Like a Pro
When it comes to serving Chicken Kiev, presentation is key. You’ve gone through the effort of ensuring the melted butter stays firmly sealed inside the chicken breast, so let’s make sure it looks as good as it tastes.
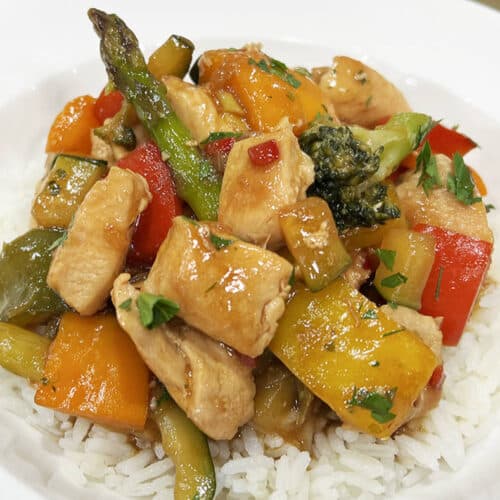
Serve your Chicken Kiev with a side of buttery mashed potatoes—trust me, they’re perfect for soaking up that stream of hot garlic butter when you cut into the chicken. Add some sautéed green beans or asparagus for a splash of color and a fresh, crisp texture that balances the richness of the chicken.
For a touch of acidity to cut through the richness, a simple salad dressed with lemon juice and olive oil is ideal. The citrusy zing complements the buttery chicken, making each bite more vibrant.
Suggested Pairings for Chicken Kiev
Pairing Chicken Kiev with the right drink can elevate your meal from delicious to unforgettable. Here are a few wine suggestions for Chicken Kiev or type of beers that work best:
White Wine: A crisp, unoaked Chardonnay or a Sauvignon Blanc with bright acidity will complement the richness of the garlic butter and the crispiness of the breadcrumb coating.
Sparkling Wine: The effervescence of a sparkling wine like Prosecco or Champagne cuts through the richness, making it a perfect pairing.
Beer: A light, hoppy beer such as a pilsner or a pale ale will refresh your palate between bites.
And if you’re a fan of non-alcoholic beverages, a sparkling water with a twist of lemon or lime works beautifully to cleanse the palate.
So there you have it, friends—a Chicken Kiev recipe that’s not only delicious but also steeped in culinary history. Whether you’re cooking for yourself, your family, or a gathering of friends, this dish is sure to impress with its crispy exterior, juicy chicken, and that irresistible stream of hot garlic butter.
This is a classic dish originating from Eastern Europe, featuring a juicy chicken breast filled with aromatic garlic and herb butter and coated with a crispy breadcrumb crust. Traditionally, this dish is served with buttery mashed potatoes to catch the butter oozing out as you cut each breast in half, making it a hearty and delicious meal.
2cupsCooking Oil (such as Avocado or Vegetable Oil)
Get Recipe Ingredients
Prevent your screen from going dark
Recipe Instructions
To begin, create the compound butter by mixing the butter with tarragon, parsley, garlic, salt, and cracked black pepper in a bowl until well combined. Roll the butter mixture into small logs using plastic wrap, ensuring they are tightly wrapped, and place them in the fridge to harden.
Preheated Oven to 375°F (190°C)
Meanwhile, prepare the chicken breasts by making a pocket in each breast from the side, being careful not to cut through to the other side. Insert a cold log of the prepared compound butter into each pocket, ensuring it is fully enclosed within the chicken. If necessary, secure the opening with a toothpick.
Next, coat each stuffed chicken breast in flour, ensuring it is fully covered. Dip each floured chicken breast into the beaten eggs and then into the seasoned panko breadcrumbs, pressing the breadcrumbs onto the chicken to ensure they adhere well.
Heat the cooking oil in a frying pan over medium-high heat until it reaches 365°F (185°C). Fry each chicken breast until golden brown on both sides, then transfer them to a baking sheet lined with parchment paper or a silicone mat.
Bake in a preheated oven for about 15 minutes or until the internal temperature reaches 160°F (71°C). Lety them rest for about 5 minutes and serve sliced in half, over buttery mashed potatoes, allowing the melted butter to drizzle over the chicken and potatoes.
Enjoy your delicious homemade Chicken Kiev!
Pro-Tips
The Secret to Perfect Chicken Kiev
Now, let’s talk pro tips. The trick to ensuring the melted butter stays firmly sealed inside the chicken breast? Partially freezing the chicken. Yes, you heard that right. After stuffing the chicken breast with that herbed garlic butter, wrap it up and give it a brief stint in the freezer. This helps the butter firm up, making it less likely to leak out during the frying process.But that’s not all. Another essential tip is to make sure your oil is hot enough—around 365°F. This allows the chicken to get that beautiful golden brown crust without overcooking the meat inside. And if you’re worried about the butter escaping, don’t hesitate to use a toothpick to seal any small openings.
Bonus Pro-Tip: Achieving the Perfect Crust
For that crispy, golden brown crust, you want to use a combination of regular breadcrumbs and panko breadcrumbs. The panko adds extra crunch, while the regular breadcrumbs help create a uniform coating. Make sure to season your breadcrumbs with a pinch of salt and pepper to enhance the flavor.And here’s a little bonus tip: when you dredge the chicken in flour, don’t forget to shake off the excess. This ensures the egg wash adheres evenly, giving you that perfect crumbed chicken.For the Seasoned Panko Breadcrumbs: click here
Equipment - You can find the items below at our online store!
Frequently Asked Questions About Chicken Kiev Recipe
1. What is Chicken Kiev, and how is it different from other stuffed chicken recipes?
Chicken Kiev is a classic dish that involves a chicken breast stuffed with a garlic herb butter, which is then breaded and fried to golden perfection. The key characteristic of Chicken Kiev is the stream of hot, melted butter that oozes out when the chicken is sliced open. This rich and flavorful butter, combined with a crispy breadcrumb coating, sets Chicken Kiev apart from other stuffed chicken recipes.
Unlike Chicken Cordon Bleu, which is stuffed with ham and cheese, Chicken Kiev’s filling is entirely focused on the buttery, garlicky goodness that makes it a rich and indulgent meal. The meticulous preparation, including the sealing of the butter inside the chicken and the careful frying process, ensures that Chicken Kiev delivers a moist and flavorful experience with every bite.
2. Where did the Chicken Kiev recipe originate, and what is its history?
The origins of Chicken Kiev are somewhat contested, with claims linking it to both French and Russian cuisines. Traditionally, Chicken Kiev is associated with the Ukrainian capital, Kyiv. However, some food historians suggest that the dish was invented by French chefs and later popularized by Russian culinary traditions during the 19th and 20th centuries.
In Soviet times, Chicken Kiev became a symbol of luxury dining, often served in high-end restaurants and enjoyed during special occasions. Over the years, the dish has traveled far and wide, becoming a staple in many households and restaurants around the world. Despite its somewhat mysterious origins, Chicken Kiev remains a beloved dish known for its decadent buttery center and crispy exterior.
3. How do you make sure the butter doesn’t leak out of your Chicken Kiev during cooking?
To prevent the butter from leaking out during cooking, several techniques can be employed. First, when preparing the butter, it should be rolled into a log shape and partially frozen before being inserted into the chicken. This step helps the butter maintain its shape and reduces the likelihood of it melting too quickly during cooking.
Additionally, when cutting the pocket in the chicken breast, it’s crucial to avoid making any holes that could allow the butter to escape. After stuffing the chicken with the butter, make sure to tightly seal the opening by pressing the edges together or using toothpicks if necessary. Finally, the breading process, which involves dredging the chicken in flour, dipping it in egg, and coating it with breadcrumbs, further helps to seal the butter inside the chicken breast.
4. Can you cook Chicken Kiev in an air fryer, and how does it affect the final result?
Yes, Chicken Kiev can be cooked in an air fryer, which is a great way to achieve a crispy exterior with less oil. To cook Chicken Kiev in an air fryer, preheat the air fryer to 375°F. Prepare the Chicken Kiev as usual, including the stuffing and breading process. Lightly spray the breaded chicken with cooking spray to help it crisp up in the air fryer.
Place the Chicken Kiev in the air fryer basket in a single layer, ensuring the pieces do not touch each other. Cook for about 15-20 minutes, flipping halfway through to ensure even cooking. The air fryer allows the chicken to become golden and crispy on the outside while keeping the inside moist and flavorful. The final result is similar to frying, but with less oil and fewer calories, making it a healthier option that doesn’t sacrifice taste or texture.
5. What kind of butter is used in Chicken Kiev, and how is it prepared?
The butter used in Chicken Kiev is typically a Garlic Herb Butter, which adds a burst of flavor to the dish. The butter is made by combining softened butter with minced garlic, freshly chopped parsley, dill, chives, and sometimes a squeeze of lemon juice for added brightness. This mixture is then seasoned with salt and pepper to enhance its flavor.
After the ingredients are mixed thoroughly, the butter is shaped into a log using plastic wrap and then chilled in the refrigerator or freezer. Chilling the butter is essential as it makes it easier to handle and helps it maintain its shape when stuffed inside the chicken breast. The herbs and garlic in the butter infuse the chicken with a rich and aromatic flavor that complements the crispy breadcrumb coating.
6. Can Chicken Kiev be baked instead of fried, and how does the cooking process differ?
Yes, Chicken Kiev can be baked instead of fried, which can be a healthier alternative and still result in a delicious dish. To bake Chicken Kiev, preheat the oven to 425°F. After stuffing and breading the chicken, place it on a baking sheet lined with parchment paper or foil. For extra crispiness, you can place the chicken on a wire rack set on the baking sheet to allow air to circulate around it.
Bake the chicken for about 25-30 minutes, or until it reaches an internal temperature of 165°F. To prevent the top from browning too much, you can tent the chicken with foil halfway through the baking process. Baking results in a slightly different texture compared to frying, but with proper technique, the chicken will still have a crispy exterior and a moist, buttery interior.
7. What are the best side dishes to serve with Chicken Kiev?
Chicken Kiev is a rich and indulgent dish, so it pairs well with sides that can balance its flavors while also complementing the buttery sauce. Mashed potatoes are a classic choice, as they can soak up any extra garlic butter that oozes out when the chicken is cut. Roasted vegetables, such as green beans, asparagus, or carrots, add a fresh and crunchy contrast to the creamy chicken.
Another great option is serving Chicken Kiev with a light salad dressed with lemon juice or vinaigrette. The acidity from the salad dressing cuts through the richness of the chicken, providing a refreshing balance. For a heartier meal, you can also serve it with rice or buttered noodles, which absorb the flavors of the garlic butter beautifully.
8. How can you ensure the breading on Chicken Kiev is extra crispy?
To achieve an extra crispy breading on Chicken Kiev, it’s important to use a combination of regular breadcrumbs and panko breadcrumbs. Panko breadcrumbs are larger and lighter, which helps create a crunchy texture. Before breading, ensure the chicken is thoroughly coated in flour, as this helps the egg adhere better, and in turn, the breadcrumbs stick more effectively.
Seasoning the breadcrumbs with salt and pepper adds flavor to the crust, making each bite more satisfying. Additionally, when frying the chicken, make sure the oil is at the correct temperature (around 365°F) before adding the chicken. Frying at the right temperature ensures that the breading crisps up quickly without absorbing too much oil, which can make it soggy.
9. Can Chicken Kiev be frozen, and what is the best way to do it?
Chicken Kiev can be frozen both before and after cooking, making it a convenient make-ahead meal. If you plan to freeze it before cooking, assemble the chicken by stuffing and breading it, then wrap each piece tightly in plastic wrap and place it in a freezer-safe container or bag. This method helps preserve the chicken’s texture and flavor.
When you’re ready to cook, thaw the frozen Chicken Kiev in the refrigerator overnight. Then, proceed with frying or baking as usual. If you have leftover cooked Chicken Kiev, it can also be frozen. Wrap it tightly in plastic wrap and foil to prevent freezer burn. Reheat it in the oven to maintain the crispy texture of the breading, as microwaving may make it soggy.
10. How do you reheat Chicken Kiev without losing its crispy texture?
To reheat Chicken Kiev while maintaining its crispy texture, the oven is your best option. Preheat the oven to 350°F and place the Chicken Kiev on a baking sheet lined with parchment paper. If you have a wire rack, use it to elevate the chicken, allowing air to circulate around it for even reheating.
Heat the chicken for about 15-20 minutes, or until it reaches an internal temperature of 165°F. This method ensures that the breading remains crisp while the interior stays moist and warm. Avoid reheating in the microwave, as it can cause the breading to become soggy and the chicken to lose its juiciness.
11. What is the best oil for frying Chicken Kiev, and why?
The best oils for frying Chicken Kiev are vegetable oil, canola oil, or peanut oil. These oils are ideal because they have a high smoke point, meaning they can be heated to the necessary temperature (around 365°F) without breaking down or burning. This ensures that the chicken fries evenly and develops a golden brown, crispy crust.
Vegetable and canola oils are also neutral in flavor, which allows the taste of the garlic herb butter and the breaded chicken to shine through without interference. Peanut oil is another excellent choice due to its high smoke point and subtle nutty flavor, which can add an extra layer of taste to the dish.
12. How do you cut the pocket in the chicken breast for Chicken Kiev?
Cutting the pocket in the chicken breast is a delicate process that requires a sharp, slim knife. Start by placing the chicken breast flat on a cutting board, with the smooth side down. Holding the chicken steady with one hand, use the knife to make a horizontal cut into the thickest part of the breast, creating a pocket about 2-3 inches deep. This pocket will hold the garlic herb butter, so it needs to be deep and wide enough to contain the filling without cutting through the other side of the breast.
Be careful not to cut all the way through the chicken, as this could cause the butter to leak out during cooking. If you do accidentally cut through, you can patch the hole by overlapping a thin piece of chicken from another part of the breast. After cutting the pocket, gently open it up to check that it’s large enough to hold the butter. The goal is to create a secure space for the butter to stay enclosed while the chicken cooks, ensuring a moist and flavorful result.
13. How do you prevent the chicken from drying out when making Chicken Kiev?
Preventing the chicken from drying out when making Chicken Kiev requires careful attention to the cooking process. First, ensure that the chicken breasts are of even thickness after pounding. This helps them cook uniformly, reducing the risk of some parts drying out while others are still cooking. The garlic herb butter inside the chicken also plays a critical role in keeping the meat moist and flavorful. As the chicken cooks, the butter melts, basting the interior of the chicken, which helps maintain its juiciness.
Another important factor is cooking time and temperature. Overcooking is the main culprit for dry chicken, so it’s crucial to monitor the internal temperature of the chicken. Aim for an internal temperature of 165°F. Whether you are frying or baking the Chicken Kiev, cooking at a consistent, moderate temperature helps to ensure that the chicken remains moist while developing a crispy exterior. If baking, be sure not to leave it in the oven too long, and if frying, avoid frying at too high a temperature, which can cook the outside too quickly and leave the inside undercooked.
14. Can Chicken Kiev be made ahead of time, and how should it be stored?
Yes, Chicken Kiev can be made ahead of time, making it a convenient option for meal prep or special occasions. To prepare Chicken Kiev in advance, you can assemble the chicken by stuffing and breading it, then wrap each piece tightly in plastic wrap. Store the wrapped chicken in the refrigerator if you plan to cook it within a day, or place it in the freezer for longer storage—up to two months.
When you’re ready to cook the prepped Chicken Kiev, if it’s frozen, allow it to thaw in the refrigerator overnight. This gradual thawing helps maintain the texture and flavor of the chicken. If you’re storing cooked Chicken Kiev, let it cool completely before wrapping it in plastic wrap and then foil, or place it in an airtight container. It will keep well in the refrigerator for 3-4 days. For reheating, it’s best to use the oven to maintain the crispy texture of the breading while ensuring the inside stays moist.
15. What are some variations of Chicken Kiev that can add a unique twist to the dish?
There are several delicious variations of Chicken Kiev that can bring a unique twist to this classic dish. One variation involves using different herbs or flavorings in the butter. For example, you could add fresh thyme, rosemary, or tarragon to the butter mix, or incorporate finely grated lemon zest for a citrusy flavor. You could also experiment with adding cheese, such as Parmesan or Gruyère, to the garlic butter, which would melt into a rich, gooey center when cooked.
Another variation is in the breading. While traditional Chicken Kiev is coated with breadcrumbs, you could use crushed Corn Flakes or seasoned panko breadcrumbs to add extra crunch. For a healthier twist, consider baking the Chicken Kiev instead of frying it, or using an air fryer. You can also play with the stuffing by adding spinach, sun-dried tomatoes, or mushrooms, which would add different layers of flavor and texture to the dish.
16. How do you store leftover Chicken Kiev, and what is the best way to reheat it?
Leftover Chicken Kiev should be stored properly to maintain its flavor and texture. Once the Chicken Kiev has cooled completely, wrap it tightly in plastic wrap or aluminum foil and place it in an airtight container. Store it in the refrigerator for up to 3-4 days. If you want to store it for a longer period, you can freeze the leftover Chicken Kiev. Wrap it in plastic wrap and then in foil, or place it in a freezer-safe container. Frozen Chicken Kiev can be kept for up to 2 months.
When reheating Chicken Kiev, the best method is to use an oven to preserve the crispy exterior. Preheat your oven to 350°F and place the Chicken Kiev on a baking sheet lined with parchment paper or on a wire rack. Heat for 15-20 minutes, or until the chicken is warmed through and the internal temperature reaches 165°F. Avoid using the microwave for reheating, as it can make the breading soggy and the chicken less juicy.
17. What is the best way to slice Chicken Kiev to prevent the butter from spilling out?
Slicing Chicken Kiev correctly is essential to ensure that the butter remains inside as much as possible, providing that delicious, moist flavor with every bite. To slice Chicken Kiev, let it rest for a few minutes after cooking. This allows the juices and butter to settle, reducing the likelihood of them spilling out immediately when cut.
Using a sharp, non-serrated knife, gently slice the Chicken Kiev at a slight angle, cutting it into portions rather than straight down the middle. This method helps control the flow of the melted butter and allows each piece to retain some of the buttery filling. Be sure to cut slowly and carefully to prevent the crust from crumbling and the butter from escaping too quickly.
18. What should you do if the butter leaks out while cooking Chicken Kiev?
If the butter leaks out while cooking Chicken Kiev, there are a few steps you can take to minimize the impact. First, if you notice the butter leaking during the frying process, quickly remove the Chicken Kiev from the pan and let it rest for a moment. You can try to seal the opening with a toothpick or press the edges together more firmly before continuing to cook.
If the butter has already leaked into the pan or baking sheet, you can still salvage the dish. The chicken will still be flavorful, though it might not have the same rich, buttery center. Consider using the melted butter from the pan as a drizzle over the cooked chicken or incorporating it into a sauce or side dish like mashed potatoes to retain the flavor. Preventing leaks in the future can be achieved by ensuring the butter is well-sealed inside the chicken and partially frozen before cooking.
19. How do you achieve the perfect golden brown color when frying Chicken Kiev?
Achieving the perfect golden brown color when frying Chicken Kiev involves a combination of the right oil temperature, proper breading technique, and cooking time. Start by heating your oil to around 365°F. If the oil is too hot, the breading will burn before the chicken is cooked through; if it’s too cool, the chicken will absorb too much oil, becoming greasy and not crisping up properly.
When breading the chicken, ensure it is evenly coated with flour, then dipped in beaten eggs, and finally rolled in breadcrumbs. This triple coating helps achieve an even, golden brown crust. Fry the Chicken Kiev in the hot oil for about 3-4 minutes per side, or until the outside is golden and crisp. Flip the chicken carefully using tongs to avoid breaking the breading. Once the chicken is golden brown on all sides, transfer it to a paper towel-lined plate to drain any excess oil before serving.
Alternatively, if you can also choose to cook your Chicken Kiev in an air fryer, which is oil free and easier to clean up.
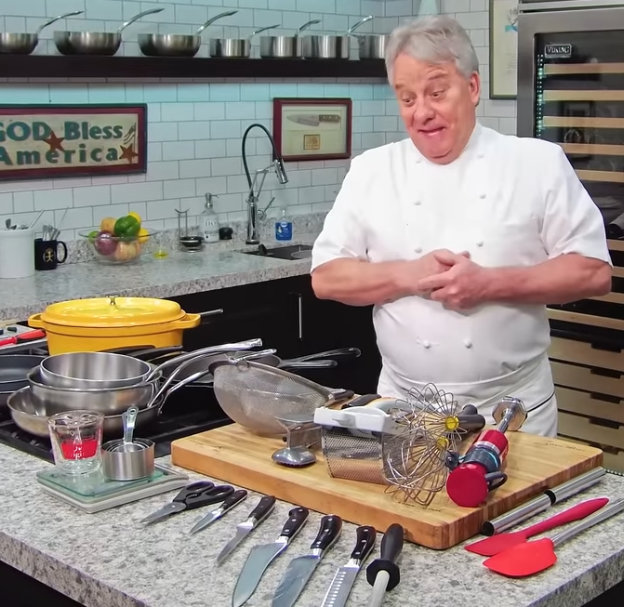
Chef Jean-Pierre, born in Aix-en-Provence, France, honed his culinary skills at a young age, mastering the art of charcuterie by the age of twelve. Determined to become a chef, he began his formal apprenticeship at L'Oustau de Baumaniere in Provence, one of the world’s best restaurants with a 3-star Michelin rating.
Jean-Pierre continued his apprenticeship on the French Riviera where he worked at famous restaurants, such as L’Oasis at La Napoule, Le Vendome in Aix-en-Provence, and the the Carlton in Cannes. In 1976, he opened The Left Bank Restaurant, consistently recognized as one of the best in America for 22 years by magazines like "Bon Appetit," "Conde Nast," "Gourmet Magazine" and "Travel & Leisure."
Jean-Pierre was also a popular TV personality, having hosted National Public Television series like "Incredible Cuisine” and "Sunshine Cuisine." He was also nominated for "Best Culinary Video" by the James Beard Foundation and operated the nationally renowned “Chef Jean-Pierre's Cooking School” and was a sought-after guest on shows like "The Today Show" and "Larry King Live."
With over 2 Million Subscribers to his Chef Jean-Pierre YouTube Channel, he is a widely respected figure in the culinary world, known for his skill and dedication to his craft, but even more so known for making gourmet cooking fun and easy to learn.
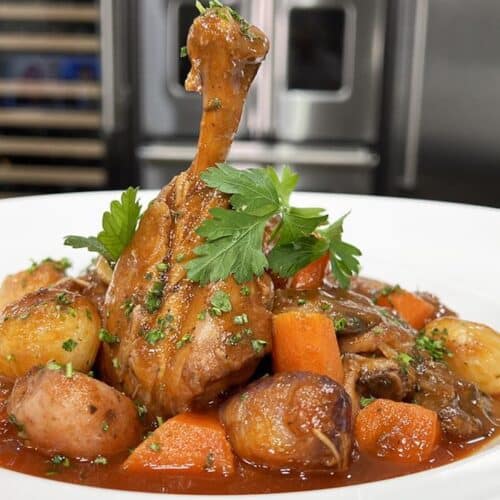
A Delicious Braised Chicken Recipe Are you looking for a delicious weekday dinner recipe that your whole family will love? If so, you'll want to try my Braised Chicken…
Hello, friends! I absolutely loved this dish. Never had anything like it. In my town, it’s fast food, chain restaurants, or you have to make it yourself. While no cook, I was able to make this, put it on a bed of the Chef’s dreamy mashed potatoes, paired it with a side of his sautéed mushrooms and topped it off with his white wine and mustard Veloute sauce. Even though this was my first attempt at anything like this, everyone in the family cleaned their plates. Wonderful.
5-inch high-carbon German Stainless Steel blade will effortlessly slice through your steak, bread, vegetables, and fruits. The handle is ergonomically designed Pakka Wood. Makes a perfect gift presented in a beautifully crafted wooden box.


Hello, friends! I absolutely loved this dish. Never had anything like it. In my town, it’s fast food, chain restaurants, or you have to make it yourself. While no cook, I was able to make this, put it on a bed of the Chef’s dreamy mashed potatoes, paired it with a side of his sautéed mushrooms and topped it off with his white wine and mustard Veloute sauce. Even though this was my first attempt at anything like this, everyone in the family cleaned their plates. Wonderful.
Absolutely delicious! Chef never disappoints. You must try this!
Delicious and so much fun to watch him cook!