Welcome friends, today I am going to share with you How to Make Ghee. A versatile ingredient, with a very high smoke point, ghee is delicious and adds a special touch to any dish. In this how-to, I will share with you a ghee recipe you can follow at home, step by step.
The Basics of Ghee
Ghee is a form of clarified butter that has been used for centuries across different cultures. Its origin can be traced back to India, where it has been cherished for its unique flavors and health benefits. By removing the water and milk solids from the butter, we are left with pure, golden ghee that has a rich, nutty taste.
Creating Ghee at Home
You might be thinking that making ghee is a complex process when in reality it is really quite simple. Started by simply melting butter, in 5 simple steps, you can make your own batch of ghee without any special equipment. All you need is unsalted butter and a bit of time.
In the following “how to”, I will guide you through the process of making ghee, from melting the butter to straining the final product. You’ll be amazed at how easy it is to create.
So, if you are ready to learn how to make ghee, let’s go!
Hello friends, today I want to share with you a straightforward 5 step procedure that will elevate your everyday cooking with a rich, nutty, and healthful addition. Making ghee might seem like a bit of a challenge, but really all you need is a large pot, some butter, and a bit of patience. The result is worth every moment spent over the stove.As you heat the butter, keep an eye on its changing textures, from a melt to a rolling boil, and finally to a simmer. The beautiful transformation from regular butter to ghee is a reminder of how simple ingredients can yield extraordinary results.So, without further ado, let's dive into the process. Remember, ghee is more than just a cooking fat—it's a key to unlocking new dimensions in your culinary journey!
Take your 2 pounds of unsalted butter and put it into a large pot or saucepan. Set your stove to medium heat and allow the butter to melt completely.
Step 2: Cooking the Ghee
Once the butter has melted, increase the heat slightly until it comes to a rolling boil. Make sure to stir occasionally during this process to prevent any burning or sticking to the bottom of the pan.
After reaching a rolling boil, reduce the heat slightly so that the mixture continues to simmer. The simmering butter should foam, and water will start evaporating. This process will take about 10-15 minutes.
Keep an eye on the mixture and stir it occasionally. Do not leave it unattended.
Step 3: Caramelizing the Milk Solids
After 10-15 minutes, you will notice the butter developing a large amount of foam on top and you might see some brown spots - these are the milk solids starting to caramelize.
Turn off the heat and let the mixture settle for about 10 minutes. The milk solids will fall to the bottom of the pan and continue to caramelize, which gives ghee its characteristic nutty flavor.
Step 4: Skimming and Straining
After the mixture has settled, gently skim off the remaining foam from the top of the butter using a spoon or ladle. Be careful not to disturb the milk solids at the bottom.
Set a sieve or strainer over a clean glass container, and line it with a cheesecloth or a clean dish towel.
Slowly pour the butter into the lined strainer. Be careful not to let the browned milk solids from the bottom of the pan pour into the strainer. Only the liquid should pass through.
Step 5: Storing the Ghee
Allow the ghee to cool down, then put the lid on your glass container. You can store ghee at room temperature for up to six months, or in the fridge for up to a year.
And there you have it, your ghee is done! Your homemade ghee is now ready to use in your favorite recipes! Enjoy the nutty flavor it brings to your dishes. Remember, unlike salted butter, ghee is, in essence, butter oil more like a cooking oil, and doesn't need added salt. You can control the salt levels in your cooking separately.
Equipment - You can find the items below at our online store!
How to Make Ghee | Chef Jean-Pierre – Video Transcript
Introduction
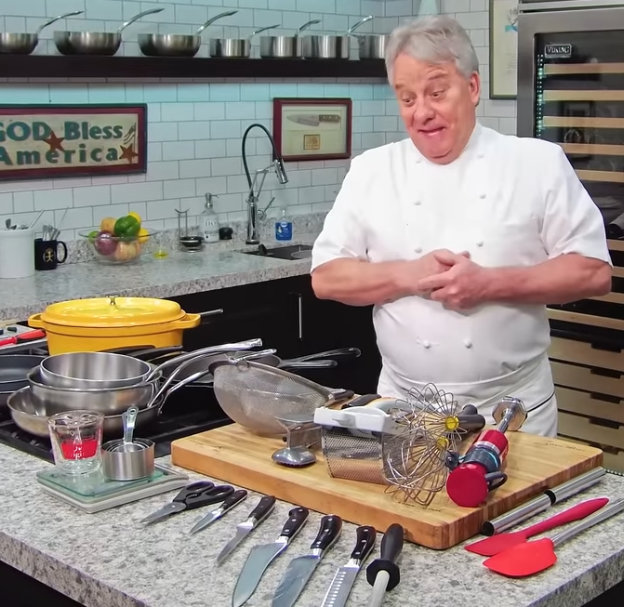
(00:00) Well, hello there, friends. Another very much requested recipe today. We’re going to show you how to make ghee.
What is ghee? Ghee is clarified butter that’s a little nutty. You came to the right channel about nutty because we are all about nutty around here!
Friends, I got ghee right here, you see. First of all, I got two pounds of butter. Let me bring them to boil. I’ll talk about this in a minute.
The Basics of Ghee
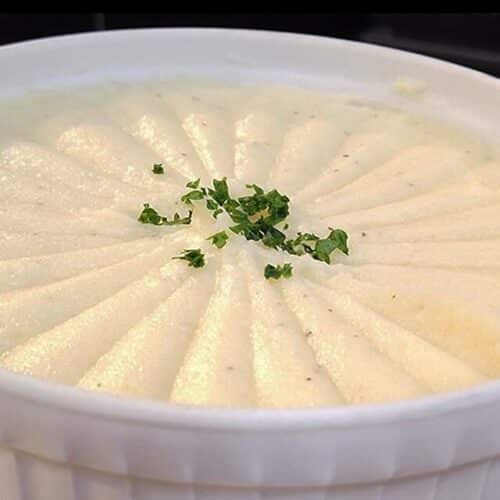
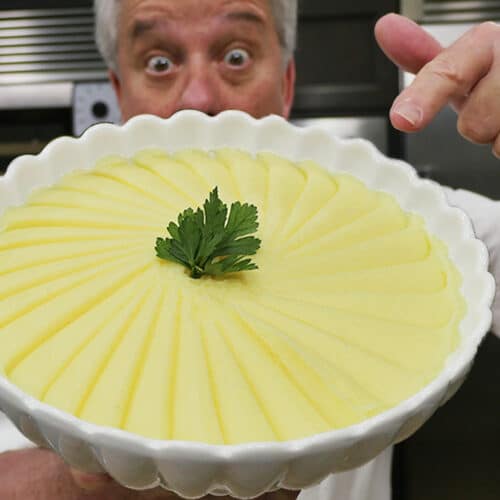
Ghee is a clarified butter. This is clarified butter and this is ghee. You see a little difference? This is golden, buttery, and this is a dark golden, and it’s also buttery.
You wonder, how do we get this one a little more nutty? Well, it’s because we caramelize the milk protein. Okay, and I’m going to show you how to do it. So it gives the butter a little more nuttiness to it.
Why does butter go bad? You know, you have butter and it goes bad really quick, right? I mean, after a month, boom, it starts to smell funny. The water promotes the growth of bacteria, so we got to get rid of it.
(01:13) The milk solid is what goes really bad in the butter, so we got to get rid of it. And we are left with what looks like an oil. The beautiful thing about why we’re doing this is because we now have a smoke point of around between 400 and 480, depends who you’re listening to. I say 450.
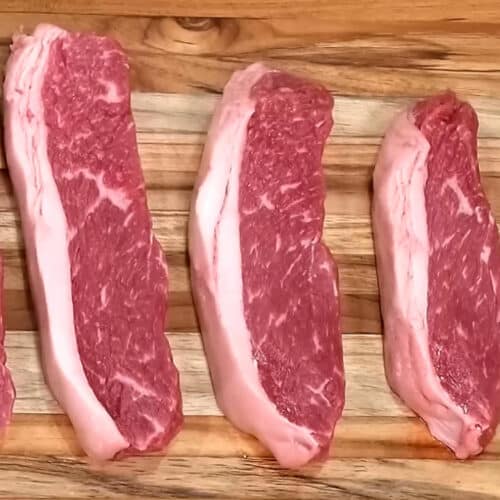
Clarified butter is very handy. So, this is why you do it because you can cook steak, chicken, fish, a multitude of things and not having to worry about burning it. If you cook with regular butter, it burns at 250 degrees.
(01:48) The milk proteins are going to burn, and then you have a brown butter. And that’s another subject, you can do a nice brown butter fish, or brown butter ravioli. There are so many things you can do with brown butter. You got to know how to do it correctly. We’ll do a video about that later.
The Advantages of Ghee
So we have two pounds of butter. Two pounds of butter, friends, is giving us just below four cups of ghee. In this video, we’re using ghee. And the beautiful thing about ghee, one more thing that is beautiful, there’s so many things beautiful about butter.
(02:22) But what is really beautiful about ghee, friends, is you can leave it at room temperature on your counter for six months, and you can leave it in the fridge for one year, not having to worry about nothing.
Cooking with Ghee
You want to cook a steak? You do it with ghee. I promise you, you won’t lose. Cooking oils taste like nothing. They’re not so good. They get rancid, and they don’t taste good. Butter always stays good, especially ghee.
(02:51) So, I hope I clarified the whole thing and clarified…oh that’s pretty interesting. I hope I clarified the clarified butter thing. And now, we’re going to make, going to show you what to do. It’s very simple ghee. We’re going to show you how to do it.
It’s very simple, right? Do two pounds. I mean, like I said, it lasts you a year in the fridge.
Handling and Storing Ghee
It is going to congeal. And when it congeals, you just take it out, you put it in a…I recommend you don’t put in one of those because containers because it’s got metal on it. And when it congeals, you can’t put it in the microwave.
What I do is I take a little bit out, put it in a small measuring cup, put it in the microwave for maybe 30 seconds, 45 seconds, depends how big the container is, and then it’s back to liquid form.
(03:22) If you leave it at room temperature or in the fridge, especially, it’s going to congeal, make it more difficult to use. But you know, you can use it when it’s solid. It’s like the consistency of regular butter, maybe a little harder.
You put it in your saucepan, you put it in your…whatever you’re going to do. But remember, it congeals, it doesn’t mean, there’s nothing wrong with it.
I find it’s easier if it’s in a liquid stage. But put a spoonful of clarified butter in there, it’s good.
Making Ghee
(04:00) So look, friends, we’re going to mix this up. We’re going to make sure it comes to a rolling boil. Right? And after it comes to a rolling boil, we’re going to reduce it down slightly.
We’re going to literally burn the milk proteins, and that’s what’s going to give us that nuttiness that I was referring to earlier, compared to clarified butter. In clarified butter, we remove the milk proteins but we don’t burn them, so it’s more buttery.
(04:29) It’s up to you. This is used in Indian Cuisine. We love Indian Cuisine, and that’s what they use in India to make all their fantastic food. They use ghee. You can use it…I use it to make stocks, and to make steaks and everything too. It’s wonderful.
Boiling and Reducing
Alright, friends. We’re going to bring it to boil. I’ll be back in a minute.
You probably can hear it bubbling. We’re going to leave it alone for a minute or two while it’s bubbling.
(05:12) Alright and what we’ll do, we’re going to mix this and we’re going to reduce. Not as high roll boil. If we leave it too long on a high roll boil, it’s going to realy really start burning the process.
So, we’re going to reduce the heat and all of the water is evaporating. We want the water out of there. That’s why we’re doing this, that’s why we’re boiling it. And then, eventually, the milk solids are going to fall to the bottom.
(05:39) Alright, so it’s going to take about 10-15 minutes for this process. If you have to mix it every once in a while, don’t worry about it, you can do that. Alright, 10-15 minutes, keep an eye on it, don’t go do something else, stay here.
Waiting for the Bubbles to Disappear
(06:14) Okay, friends. 15 minutes later, you got a big foam over there. You see big foam? And if you notice, we see a little brown spot bits right there.
It’s going to take a little while for the bubbles to subside, so we’re going to wait a couple of minutes until the bubbles subside. Then we’re going to look in the bottom, and you’re going to see the milk solids have actually burned. And that’s what gives us the nutty flavor.
So we’re going to wait a few minutes for all those bubbles to disappear, and then I’ll come back. Alright, wait a couple of minutes.
Allowing Milk Solids to Settle
(06:47) Okay, friends. So now, you can see right here, we still got bubbles. The heat is off. What happened is the milk solids have burned and they need to fall to the bottom. So we’re going to wait for that to happen.
It could take about 10 minutes. So, we’re going to wait for them to settle at the bottom because they are all over the place now, those milk proteins. We’re going to wait until they fall to the bottom.
(07:14) So, let’s wait a few more minutes, remember about 10 minutes. And now you’re done. The heat is off, you did what you’re supposed to do. So now, let’s just wait.
Removing the Foam
(07:14) Okay, friends, you probably can’t see much but there’s a few bubbles still going on. This is just from the heat. So, what I did is, I just moved a little bit of the whey from the milk, right there, the middle.
We’re just going to remove this. So, I have a ladle right there. I’m just gonna go slowly and just remove it. Now, just push them to the side. See, it’s very easy to remove. We don’t want to disturb the bottom, so it’s best if you wait.
(07:46) Just wait a little bit longer, you know. I’m just waiting about 10-15 minutes, but if you wait longer, you’re better off. So if you got things to do, come back in a half hour from now. It’s even better, friends.
Straining the Ghee
Alright, so now what we’re going to do. Let me take a clean ladle, because this one has some of the milk in there. I’m going to take a clean ladle and I’m just gonna start pouring it.
Let me just remove this right there. And I have a screen, I mean a strainer, and I have a cheesecloth in here. If you don’t have a cheesecloth, you can use a bath towel, you can use whatever you want, friends.
(08:22) I put it right here. You got it right here, Jack? Right here, you good, Jack? How about, let me push that right now, are you good? Okay, I’m just gonna pour this right here. And remember, now, be gentle with the bottom.
Completing the Process
(08:24) Eventually, we’re just going to pour it. I want to show you. You just want to take a little bit out. Remember, don’t touch the bottom.
Alright, friends, very simple. Let me just do this right now. I’m going to take my towels and I’m gonna pour it in.
(08:42) Alright, I’m gonna go right here, is it good right there, the angle Jack? You’re good right there? Alright, so I’m going to do it slowly.
You see the burned bits at the bottom, friends? This is what’s going to give us a beautiful nutty color, okay.
(08:56) We got to make sure that the bottom of it does not go in. You see, you’ll see eventually you can start to see it coming in. See that little line in the middle there? Can you see it Jack? You’re good, yeah.
Alright so we just stop right there friends you see. And now it smells a little nutty. And then you’re good right there. It it’s either the cheesecloth caught. So anything really works there friends. Caught whatever you had left. And right my friends, you have yourself ghee.
To Salt or Not to Salt
(09:38) Quick subject, and I almost forget to talk about it. Salt. Everybody’s always asking me, “Do I use salted butter or unsalted butter?”
Think about ghee as an oil you’re cooking with. When you buy cooking oil, olive oil, or any cooking oil, avocado oil. Do you buy salted oil?
No. Because you want to put the salt on your steak, on your fish, on your chicken. Whatever it is you’re cooking. The way you want it. You want to put on the right amount and the right quantity of salt you want.
So you don’t need salt in there. So you’re not going to drink this.
In Closing “How to Make Ghee”
(10:28) So, I hope you enjoyed the How to Make Ghee video and remember, go out and make clarified butter, or make ghee.
Thanks for watching and remember thumbs up if you like the video, and don’t forget to subscribe to the channel friends. And don’t forget to ring that bell. Thanks for watching!
Now that you know how to make ghee, what’s the first dish you are going to make with it?
Chef Jean-Pierre, born in Aix-en-Provence, France, honed his culinary skills at a young age, mastering the art of charcuterie by the age of twelve. Determined to become a chef, he began his formal apprenticeship at L'Oustau de Baumaniere in Provence, one of the world’s best restaurants with a 3-star Michelin rating.
Jean-Pierre continued his apprenticeship on the French Riviera where he worked at famous restaurants, such as L’Oasis at La Napoule, Le Vendome in Aix-en-Provence, and the the Carlton in Cannes. In 1976, he opened The Left Bank Restaurant, consistently recognized as one of the best in America for 22 years by magazines like "Bon Appetit," "Conde Nast," "Gourmet Magazine" and "Travel & Leisure."
Jean-Pierre was also a popular TV personality, having hosted National Public Television series like "Incredible Cuisine” and "Sunshine Cuisine." He was also nominated for "Best Culinary Video" by the James Beard Foundation and operated the nationally renowned “Chef Jean-Pierre's Cooking School” and was a sought-after guest on shows like "The Today Show" and "Larry King Live."
With over 1.8 Million Subscribers to his Chef Jean-Pierre YouTube Channel, he is a widely respected figure in the culinary world, known for his skill and dedication to his craft, but even more so known for making gourmet cooking fun and easy to learn.
Clarified Butter (How to Make and Why!) Clarified Butter!! Easy to make and so important to have on hand when cooking your favorite meals. The smoke point of clarified butter is…
Thank you chef jean im helen goco from philipinnes I love watching you cook ,i was able to watch you just now and i enjoy watching..I will try the ghee that you made and the coleslaw..thank you again..more power
5-inch high-carbon German Stainless Steel blade will effortlessly slice through your steak, bread, vegetables, and fruits. The handle is ergonomically designed Pakka Wood. Makes a perfect gift presented in a beautifully crafted wooden box.


Thank you chef jean im helen goco from philipinnes I love watching you cook ,i was able to watch you just now and i enjoy watching..I will try the ghee that you made and the coleslaw..thank you again..more power