Hello friends, today we’re diving into something different – an easy Homemade Bread Recipe! We’re making Pain de Mie. This French sandwich bread is fantastic and so easy to make. It’s the perfect white sandwich bread, and I’m going to show you the trick to making it.
Trust me, anybody can do it. Even if you don’t bake, you can bake this. I promise you, you’re going to love it. It’ll take your sandwich game to the next level!
Origins of Pain de Mie (Easy Homemade Bread Recipe)
Pain de Mie originates from France and has been a staple in French households for generations. Its name translates to “bread of the crumb,” emphasizing its soft, dense interior.
Traditionally, this bread was baked in lidded pans to create a perfect square shape, making it easy to slice uniformly. This simple yet excellent homemade bread recipe brings a touch of European culinary tradition right to your kitchen.
Serving Pain de Mie
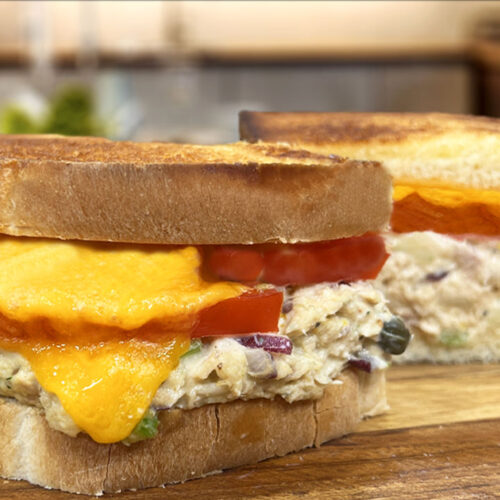
Pain de Mie is the most dense and perfect bread for sandwiches. It’s best when served fresh, making it an ideal base for all kinds of sandwiches. Its mild flavor goes well with various fillings, from savory deli meats and cheeses to sweet spreads and fruits. Toasting it gives a beautiful golden crust, adding a satisfying crunch. Whether you’re making breakfast toast, a lunch sandwich, or even French toast, Pain de Mie is versatile and never disappoints.
Main Dishes That Pair Well with Pain de Mie
This homemade bread pairs beautifully with hearty soups and stews, soaking up flavors wonderfully. It’s excellent alongside a charcuterie board for a gourmet touch or as a base for a classic grilled cheese to go with tomato soup. Pain de Mie’s versatility means it can complement almost any dish, making it a must-have in your bread-making repertoire.
Pro Tips for the Perfect Homemade Bread Recipe
When making this homemade bread recipe for Pain de Mie, the key is in the resting and proofing times. Letting the dough rise adequately ensures a light, airy texture. Use a warm, draft-free area to proof the dough. If your kitchen is too cold, proof it in the oven with just the light on for gentle warmth.
Using room temperature ingredients is crucial. Cold butter or milk can hinder the yeast activity, resulting in a dense loaf. If you don’t have a special Pain de Mie pan, a regular loaf pan works just fine, but be sure to butter it well to avoid sticking.
Bonus Pro Tip for this Easy Homemade Bread Recipe
For an extra flavor twist, try adding a touch of garlic or herb-infused olive oil to your dough. It infuses the bread with subtle aromatic flavors that make your sandwiches even more delicious. And remember, patience is key. Let the bread cool completely before slicing to avoid a gummy texture.
Creating Pain de Mie at home is a rewarding experience, combining simplicity and tradition. With these tips and a bit of practice, you’ll be making bakery-quality bread that elevates any meal. Enjoy your baking and the delightful taste of homemade Pain de Mie!
Also known as French sandwich bread, is a classic white bread that is soft, dense, and perfect for making sandwiches. This easy-to-make bread is great for both beginners and experienced bakers. With just a few simple ingredients, you can elevate your sandwich game and enjoy the delicious taste of homemade bread.
In a small bowl, mix warm water with active dry yeast and let it sit for 10 minutes.
In a large mixing bowl, combine bread flour, sugar, butter, and warm milk. Pour the yeast mixture into the flour mixture and use a spatula to combine until a rough dough forms. Add salt and mix until well incorporated.
Transfer the dough to a lightly floured surface and knead briefly to form a rough ball. Place the dough in a greased bowl, cover with plastic wrap, and let it rise in a warm room (80°/90°) until it doubles in size, about 1 to 1.5 hours.
Once risen, lightly oil your hands and shape the dough into a rectangle. Roll it into a log, pinching the seams to seal. Place the dough in a greased loaf pan, cover, and let it rise again until it reaches just below the top of the pan, about 30 minutes to 1 hour.
Now Preheat the Oven to 400°F (200°C)
Bake the bread for 30 to 35 minutes, until golden brown. Remove the bread from the oven and let it cool in the pan for 5 to 10 minutes before transferring to a wire rack to cool completely. Allow the bread to cool for at least 2 hours before slicing to ensure the best texture.
Enjoy your Pain De Mie with your favorite sandwich fillings!
Equipment - You can find the items below at our online store!
Frequently Asked Questions About Pain de Mie: Easy Homemade Bread Recipe
1. What is the easiest homemade bread recipe to make?
The easiest homemade bread recipe to make is often a basic white bread or a Pain de Mie, which is a French sandwich bread. These recipes typically require minimal ingredients and steps, making them accessible even for novice bakers. Pain de Mie, for example, only needs flour, water, yeast, sugar, butter, milk, and salt. The process involves mixing, letting the dough rise, shaping, and baking, with no special equipment required other than a loaf pan.
Using a recipe like Pain de Mie ensures that you get a soft, dense loaf perfect for sandwiches. The ingredients are simple, and the method is forgiving, allowing even those without much baking experience to achieve great results. The key is to follow the steps carefully and ensure your dough rises adequately.
2. How do I know when my bread dough is properly kneaded?
You can tell when your bread dough is properly kneaded by its texture and elasticity. Well-kneaded dough should be smooth and slightly tacky but not sticky. When you press it lightly with your finger, it should spring back. Additionally, you can use the windowpane test: stretch a small piece of dough between your fingers. If it stretches thin without tearing and you can see light through it, it’s properly kneaded.
Kneading helps develop the gluten structure, which gives the bread its chewy texture and helps it rise well. If kneading by hand, it typically takes about 10 minutes of rhythmic folding and pressing. Using a stand mixer with a dough hook can reduce this time to about 5-7 minutes.
3. Why is my homemade bread dense?
Homemade bread can be dense due to several factors, including insufficient kneading, not enough time for the dough to rise, or using flour with low protein content. Proper kneading is essential to develop gluten, which traps the gases produced by yeast and helps the bread rise. If the dough doesn’t rise adequately, the bread will be dense.
Another common cause of dense bread is incorrect yeast activation. Ensure the yeast is fresh and properly proofed in warm water (about 100°F) before mixing with other ingredients. Additionally, using bread flour instead of all-purpose flour can improve the texture due to its higher protein content.
4. How long should bread dough rise?
Bread dough should typically rise until it has doubled in size, which usually takes about 1 to 2 hours depending on the room temperature. For a second rise, after shaping the dough, it should rise again until it has increased in size by about 50%, usually taking another 45 minutes to an hour.
The exact time can vary based on the environment. Warmer temperatures will speed up the rising process, while cooler temperatures will slow it down. If your kitchen is cold, you can create a warm proofing environment by placing the dough in the oven with just the light on.
5. Can I use all-purpose flour instead of bread flour?
Yes, you can use all-purpose flour instead of bread flour in most bread recipes, including Pain de Mie. However, bread flour has a higher protein content, which contributes to better gluten development, resulting in a chewier texture and a better rise.
When using all-purpose flour, you might notice a slight difference in the bread’s texture. It may be a bit softer and less chewy, but it will still be delicious and perfectly suitable for most uses. If you want to improve the gluten strength when using all-purpose flour, you can add a tablespoon of vital wheat gluten per cup of flour.
6. How do I store homemade bread to keep it fresh?
To keep homemade bread fresh, store it in an airtight plastic bag or bread box at room temperature. This will help prevent it from drying out. Bread stored this way typically stays fresh for about 2 to 3 days. For longer storage, you can freeze the bread.
To freeze, wrap the bread tightly in plastic wrap and place it in a freezer bag. It can be stored in the freezer for up to three months. When you’re ready to use it, let it thaw at room temperature. Avoid storing bread in the refrigerator as it can accelerate staling.
7. What is the best way to slice homemade bread?
The best way to slice homemade bread is to use a serrated bread knife. Ensure the bread is completely cooled to avoid squishing the loaf and getting uneven slices. If you prefer, you can use a bread slicer guide to get uniform slices.
To make slicing easier, turn the loaf on its side and use a gentle sawing motion with the serrated knife. This method reduces the pressure on the loaf and helps achieve cleaner cuts. Always slice bread on a sturdy cutting board to maintain control and ensure safety.
8. Can I make homemade bread without a bread machine?
Absolutely, you can make homemade bread without a bread machine. Most bread recipes, including Pain de Mie, can be made with basic kitchen tools. You’ll need a mixing bowl, a spatula or wooden spoon, and a loaf pan. Kneading can be done by hand or with a stand mixer if you have one.
The process involves mixing the ingredients, kneading the dough, letting it rise, shaping it, and then baking it. The steps are straightforward, and with a bit of practice, you’ll find that making bread by hand is quite rewarding.
9. How can I add flavor to my homemade bread recipe?
You can add flavor to your homemade bread by incorporating herbs, spices, cheese, or infused oils into the dough. For example, adding garlic or herb-infused olive oil can give the bread a wonderful aromatic flavor. You can also mix in ingredients like roasted garlic, chopped olives, or shredded cheese.
For sweet bread, consider adding ingredients like cinnamon, dried fruits, or nuts. These additions not only enhance the flavor but also make your bread more interesting and enjoyable. Just be sure to balance the added ingredients with the rest of the dough to maintain the right texture and consistency.
10. How do I make sure my bread has a crispy crust?
To achieve a crispy crust, bake the bread in a preheated oven with steam. You can create steam by placing a pan of water on the bottom rack of the oven while the bread bakes or by misting the oven with water using a spray bottle. This steam helps develop a crispy, golden crust.
Additionally, you can brush the loaf with water or an egg wash before baking. For an extra crispy crust, bake the bread on a preheated baking stone or a cast-iron skillet. This method transfers heat more efficiently to the bread, promoting a better rise and a crispier crust.
11. How do I proof yeast properly?
To proof yeast properly, dissolve it in warm water (about 100°F) with a bit of sugar. Let it sit for 5-10 minutes until it becomes frothy and bubbly. This indicates that the yeast is active and ready to be used in the dough.
Proofing yeast ensures that it is alive and capable of fermenting the dough. If the yeast does not become frothy, it may be dead or the water may have been too hot or too cold. In such cases, discard the mixture and start again with fresh yeast and properly warm water.
12. Can I freeze bread dough?
Yes, you can freeze bread dough. After the first rise, shape the dough into loaves and place them in a freezer-safe container or bag. When ready to bake, let the dough thaw and rise at room temperature before baking as directed. This allows you to have fresh-baked bread whenever you want without starting from scratch.
Freezing bread dough is convenient and ensures you have fresh dough on hand. Be sure to wrap it tightly to prevent freezer burn and let it rise completely before baking to achieve the best texture and flavor.
13. Why does homemade bread taste better than store-bought bread?
Homemade bread often tastes better than store-bought bread because it contains fresher ingredients and lacks preservatives and additives. Making bread at home allows you to control the quality of ingredients, resulting in a more flavorful and wholesome product.
The freshness of homemade bread is unmatched. It also allows for customization, such as adding your favorite herbs, seeds, or flavors, making the bread more enjoyable and tailored to your taste preferences.
14. How do I make my bread rise faster?
To make bread rise faster, you can place the dough in a warm, draft-free environment. Preheating the oven to a low temperature (around 180°F), then turning it off and placing the dough inside with the door slightly open can create an ideal proofing environment. The warmth accelerates yeast activity, shortening the rising time.
Using a proofing box or simply setting the dough near a warm spot in your kitchen, such as on top of a warm oven or under a light, can also help. Just ensure the temperature is not too hot, as excessive heat can kill the yeast.
15. Can I make this homemade bread recipe without sugar?
Yes, you can make bread without sugar, although sugar helps activate the yeast and adds a touch of sweetness. For a completely sugar-free bread, ensure the yeast is fresh and active. You can use alternatives like honey or maple syrup, or omit sweeteners altogether if preferred.
While sugar aids in browning and flavor, its absence won’t prevent the bread from rising. Just be sure to proof the yeast properly and monitor the dough’s rise to ensure good texture and volume in your finished loaf.
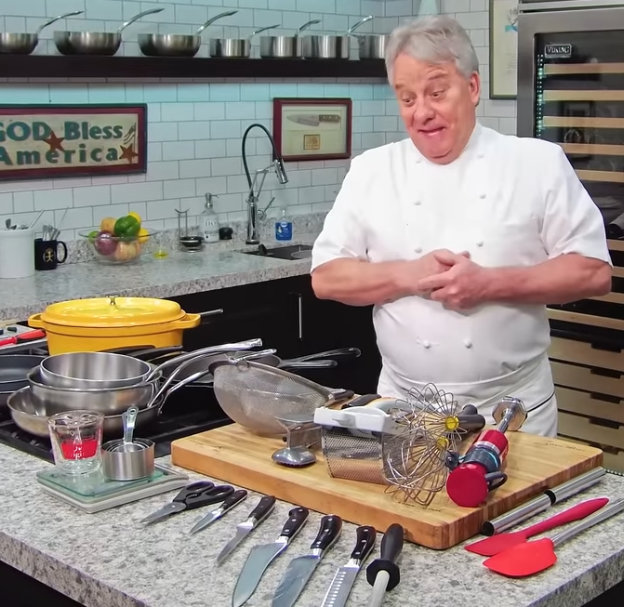
Chef Jean-Pierre, born in Aix-en-Provence, France, honed his culinary skills at a young age, mastering the art of charcuterie by the age of twelve. Determined to become a chef, he began his formal apprenticeship at L'Oustau de Baumaniere in Provence, one of the world’s best restaurants with a 3-star Michelin rating.
Jean-Pierre continued his apprenticeship on the French Riviera where he worked at famous restaurants, such as L’Oasis at La Napoule, Le Vendome in Aix-en-Provence, and the the Carlton in Cannes. In 1976, he opened The Left Bank Restaurant, consistently recognized as one of the best in America for 22 years by magazines like "Bon Appetit," "Conde Nast," "Gourmet Magazine" and "Travel & Leisure."
Jean-Pierre was also a popular TV personality, having hosted National Public Television series like "Incredible Cuisine” and "Sunshine Cuisine." He was also nominated for "Best Culinary Video" by the James Beard Foundation and operated the nationally renowned “Chef Jean-Pierre's Cooking School” and was a sought-after guest on shows like "The Today Show" and "Larry King Live."
With over 2 Million Subscribers to his Chef Jean-Pierre YouTube Channel, he is a widely respected figure in the culinary world, known for his skill and dedication to his craft, but even more so known for making gourmet cooking fun and easy to learn.
I have never commented on a recipe before, but this bread is the BEST bread I have ever made and I am nearly 80 years old and have baked many a loaf. My husband even agrees with me. Thank you!
My age and experience are the same as yours!
I even successfully baked it in my Val Cucina tabletop oven.
(I store pans in my regular oven which I use occasionally to cook a pumpkin or an angel food cake.
Made this bread and it was great! I didn’t have bread flour so I just used all purpose flour and the recipe turned out fine. A couple of things I noted using all purpose flour. First, weigh the flour. Don’t trust scooping cups. That can throw off the numbers. Second, with all purpose flour the dough was stickier. I rolled it out on a bit more flour before doing first rise. It still turned out fine. I didn’t melt the butter like I normally have in bread. I put it in at room temperature and let the mixer do the work. I let it run on medium high for about 6 minutes.
I have made other bread recipes and thus far, this is one of my favorite enriched doughs so far. I love the pan and the shape of the bread in the end!
7.5” x 4 x 4.4. It is for one pound of dough. I used the link in the video that took me to Amazon. It was on sale for 10 bucks today so I bought a second pan.
You may be overcooking. all ovens differ in temps. Maybe drop cook time by 5 min check it with a thermometer. when it reads 195 – 200 F pull it out its done. It is easy to overcook when using the pullman loaf pan with lid since you cant look at the browning.
The circulating air mode refers to a convection oven, which has a fan in the oven chamber. Top and bottom heat are just that, the heat comes from two locations (the top and bottom of the oven). The heat sources coming from two locations can help brown things, while the convection oven keeps everything at more of an even temperature with no “hot spots”.
Recipe could not be better. I did use a stand mixer, but I usually do with all dough. Had to really watch the dough rise carefully as it rises quickly in a proofing oven. Regardless, it turned out great!
I’m chiming in for the third time. This has become our daily bread recipe with some of my own tweaks. Chef, I’d love to hear your thoughts on my changes which move this away from traditional French sandwich bread.
This is SO EASY to make. I now make it with 100% whole wheat pastry flour and honey for my husband, white bread flour for me, and as cinnamon bread for both of us.
I have added a pinch of salt, 1 tablespoon of butter, and I mix the water and milk from the outset in which to proof the yeast. When using honey, I add 1 T. to the warm liquid at the outset and 1 T. before adding to the dry ingredients.
Also, I knead the dough a little more than in the video before the first proof and knead again perhaps 10-12 times before putting it in the pan to rise for the last time.
I’m still tweaking the cinnamon bread because the first time the swirl was unstable. Next time I’ll roll out the dough into a longer rectangle and create more of a swirl. I butter it, then put on dark brown sugar and cinnamon. I may add raisins and/or walnuts but these get the toaster a bit messy.
After baking and cooling a loaf, I slice it thinly and freeze it. This keeps the bread super fresh and gives the needed stability to the cinnamon swirl bread.
I wrote a previous review saying it wasn’t the best bread I’ve had but good and that I was going to try to make swirled cinnamon bread in the pain de mie pan. It turned out really well! I kneaded it more than the previous times I’ve made pain de mie and I think that helped the texture. I also cut and froze the bread so it was easy to put the cinnamon bread in the toaster as the swirl was quite loose.
I love this bread because it is so easy to make. I’m going to try making it with partially whole wheat flour and try a gluten free version.
I use this bread s breakfast toast. It is very good, but not the best for this purpose. Right now I am experimenting with making swirled cinnamon bread. I’m going to butter it before rolling and add brown sugar, cinnamon and raisins.
I made this recipe several times and it is my families absolute favourite!
Lovely with a nice soup or some good mature cheese.
One small note of comment, in the metric recipe the room temperature for rising the dow states 80-90 degrees, however, this is Fahrenheit, not Celcius, which comes to about 30 degrees Celcius.
I’m going to try the recipe with whole weat flower next, see what happens.
If that works out, I will be hooked on this bread forever, it is so wonderfully moist and simply delicious.
Thank you so much for sharing your recipes, Chef!
Greeting from Utrecht, the Netherlands
I have been making this bread every weekend since the video was posted! It is Amazing! So easy and so delicious! I bought the pan Chef Jean Pierre uses and highly recommend it!
Many thanks to Chef Jean Pierre for teaching this wonderful recipe to me!
My 3d try and the bread came out perfect. Previous 2 times the yeast was not good. Love Chef, teaches us so simple, yes even a child can do it. LOL Thanks Chef!!
Absolutely delicious. Tasty, crusty, easy to make! Will be making this often! Make’s delicious French toast and regular toast. Bet grilled cheese will be excellent too! Thx chef!
The bread is out of this world. today I make more bread, but I add bacon, jalapeños and cheese. The way Chef Lean Pierre explains how to is the best. Thank you
Chef does it again! We just had our first sandwich and my oh my. Delicious. My wife is elated. We have been making our own bread for 8 or so years and this will certainly become our go to sandwich bread. Look forward to making it at least once a week. Thank you Chef and Jack
5-inch high-carbon German Stainless Steel blade will effortlessly slice through your steak, bread, vegetables, and fruits. The handle is ergonomically designed Pakka Wood. Makes a perfect gift presented in a beautifully crafted wooden box.


I had to use a Pyrex loaf dish but still came out fantastic!!! I’m hooked
I have never commented on a recipe before, but this bread is the BEST bread I have ever made and I am nearly 80 years old and have baked many a loaf. My husband even agrees with me. Thank you!
My age and experience are the same as yours!
I even successfully baked it in my Val Cucina tabletop oven.
(I store pans in my regular oven which I use occasionally to cook a pumpkin or an angel food cake.
Excellent recipe, Chef!
I baked my first loaf this afternoon, and I am in bliss. Thank you!
quick question, is the butter unsalted?
Chef Jean-Pierre always uses Unsalted Butter
Made this bread and it was great! I didn’t have bread flour so I just used all purpose flour and the recipe turned out fine. A couple of things I noted using all purpose flour. First, weigh the flour. Don’t trust scooping cups. That can throw off the numbers. Second, with all purpose flour the dough was stickier. I rolled it out on a bit more flour before doing first rise. It still turned out fine. I didn’t melt the butter like I normally have in bread. I put it in at room temperature and let the mixer do the work. I let it run on medium high for about 6 minutes.
I have made other bread recipes and thus far, this is one of my favorite enriched doughs so far. I love the pan and the shape of the bread in the end!
What size loaf pan did you use in the video?
7.5” x 4 x 4.4. It is for one pound of dough. I used the link in the video that took me to Amazon. It was on sale for 10 bucks today so I bought a second pan.
Tried it twice and both times it was very dry. Am I doing something wrong?
You may be overcooking. all ovens differ in temps. Maybe drop cook time by 5 min check it with a thermometer. when it reads 195 – 200 F pull it out its done. It is easy to overcook when using the pullman loaf pan with lid since you cant look at the browning.
This recipe looks super great – I gonna try this out! One question before starting:
Which “heating mode” should be used:
“top and bottom heat” or “circulating air”?
In other recipes they sometimes say like 180 degrees circulating air mode or 200 degrees top and bottom heat – that’s why I ask 🙂
The circulating air mode refers to a convection oven, which has a fan in the oven chamber. Top and bottom heat are just that, the heat comes from two locations (the top and bottom of the oven). The heat sources coming from two locations can help brown things, while the convection oven keeps everything at more of an even temperature with no “hot spots”.
Recipe could not be better. I did use a stand mixer, but I usually do with all dough. Had to really watch the dough rise carefully as it rises quickly in a proofing oven. Regardless, it turned out great!
I’m chiming in for the third time. This has become our daily bread recipe with some of my own tweaks. Chef, I’d love to hear your thoughts on my changes which move this away from traditional French sandwich bread.
This is SO EASY to make. I now make it with 100% whole wheat pastry flour and honey for my husband, white bread flour for me, and as cinnamon bread for both of us.
I have added a pinch of salt, 1 tablespoon of butter, and I mix the water and milk from the outset in which to proof the yeast. When using honey, I add 1 T. to the warm liquid at the outset and 1 T. before adding to the dry ingredients.
Also, I knead the dough a little more than in the video before the first proof and knead again perhaps 10-12 times before putting it in the pan to rise for the last time.
I’m still tweaking the cinnamon bread because the first time the swirl was unstable. Next time I’ll roll out the dough into a longer rectangle and create more of a swirl. I butter it, then put on dark brown sugar and cinnamon. I may add raisins and/or walnuts but these get the toaster a bit messy.
After baking and cooling a loaf, I slice it thinly and freeze it. This keeps the bread super fresh and gives the needed stability to the cinnamon swirl bread.
Delicious, thank you Chef.
I wrote a previous review saying it wasn’t the best bread I’ve had but good and that I was going to try to make swirled cinnamon bread in the pain de mie pan. It turned out really well! I kneaded it more than the previous times I’ve made pain de mie and I think that helped the texture. I also cut and froze the bread so it was easy to put the cinnamon bread in the toaster as the swirl was quite loose.
I love this bread because it is so easy to make. I’m going to try making it with partially whole wheat flour and try a gluten free version.
I use this bread s breakfast toast. It is very good, but not the best for this purpose. Right now I am experimenting with making swirled cinnamon bread. I’m going to butter it before rolling and add brown sugar, cinnamon and raisins.
I made this recipe several times and it is my families absolute favourite!
Lovely with a nice soup or some good mature cheese.
One small note of comment, in the metric recipe the room temperature for rising the dow states 80-90 degrees, however, this is Fahrenheit, not Celcius, which comes to about 30 degrees Celcius.
I’m going to try the recipe with whole weat flower next, see what happens.
If that works out, I will be hooked on this bread forever, it is so wonderfully moist and simply delicious.
Thank you so much for sharing your recipes, Chef!
Greeting from Utrecht, the Netherlands
I have been making this bread every weekend since the video was posted! It is Amazing! So easy and so delicious! I bought the pan Chef Jean Pierre uses and highly recommend it!
Many thanks to Chef Jean Pierre for teaching this wonderful recipe to me!
Can you please tell me where to buy the bread pan chef Jean-Pierre used and the size ? I am in Australia. Thank you.
I bought mine on Amazon.com.au
My 3d try and the bread came out perfect. Previous 2 times the yeast was not good. Love Chef, teaches us so simple, yes even a child can do it. LOL Thanks Chef!!
Absolutely delicious. Tasty, crusty, easy to make! Will be making this often! Make’s delicious French toast and regular toast. Bet grilled cheese will be excellent too! Thx chef!
I had a one pound bread pan and the dough pushed out of the pan. What size is optimal for the recipe as written?
Got exactly the one that the Chef used on amazon.de. The size is 20,8x12x11cm.
Worked out perfectly.
Size of the pan plz?
The bread is out of this world. today I make more bread, but I add bacon, jalapeños and cheese. The way Chef Lean Pierre explains how to is the best. Thank you
Chef does it again! We just had our first sandwich and my oh my. Delicious. My wife is elated. We have been making our own bread for 8 or so years and this will certainly become our go to sandwich bread. Look forward to making it at least once a week. Thank you Chef and Jack
Great test, easy to make it, no mixer for kneading the dough! Chef JP comes always with the best recipes!!